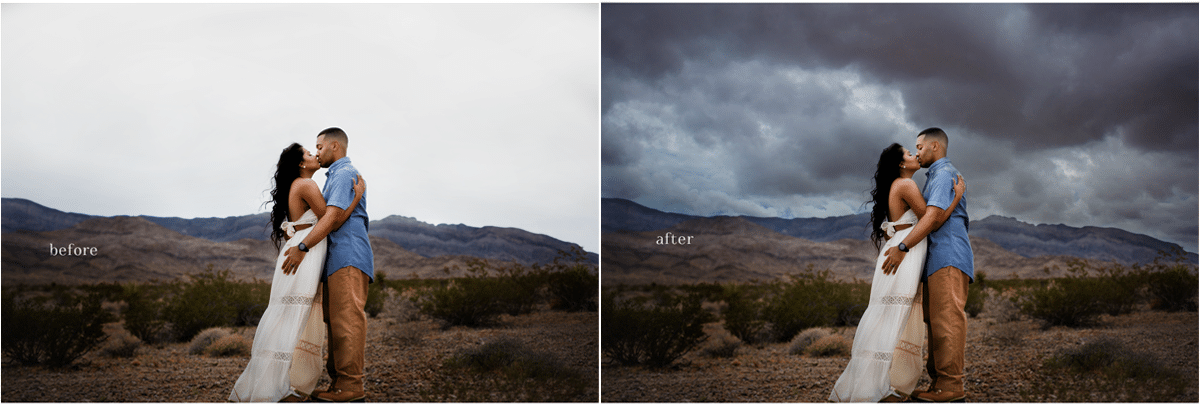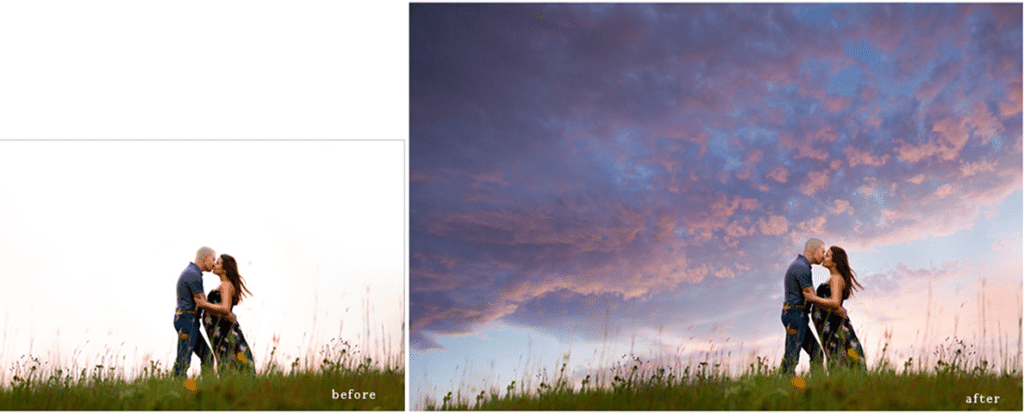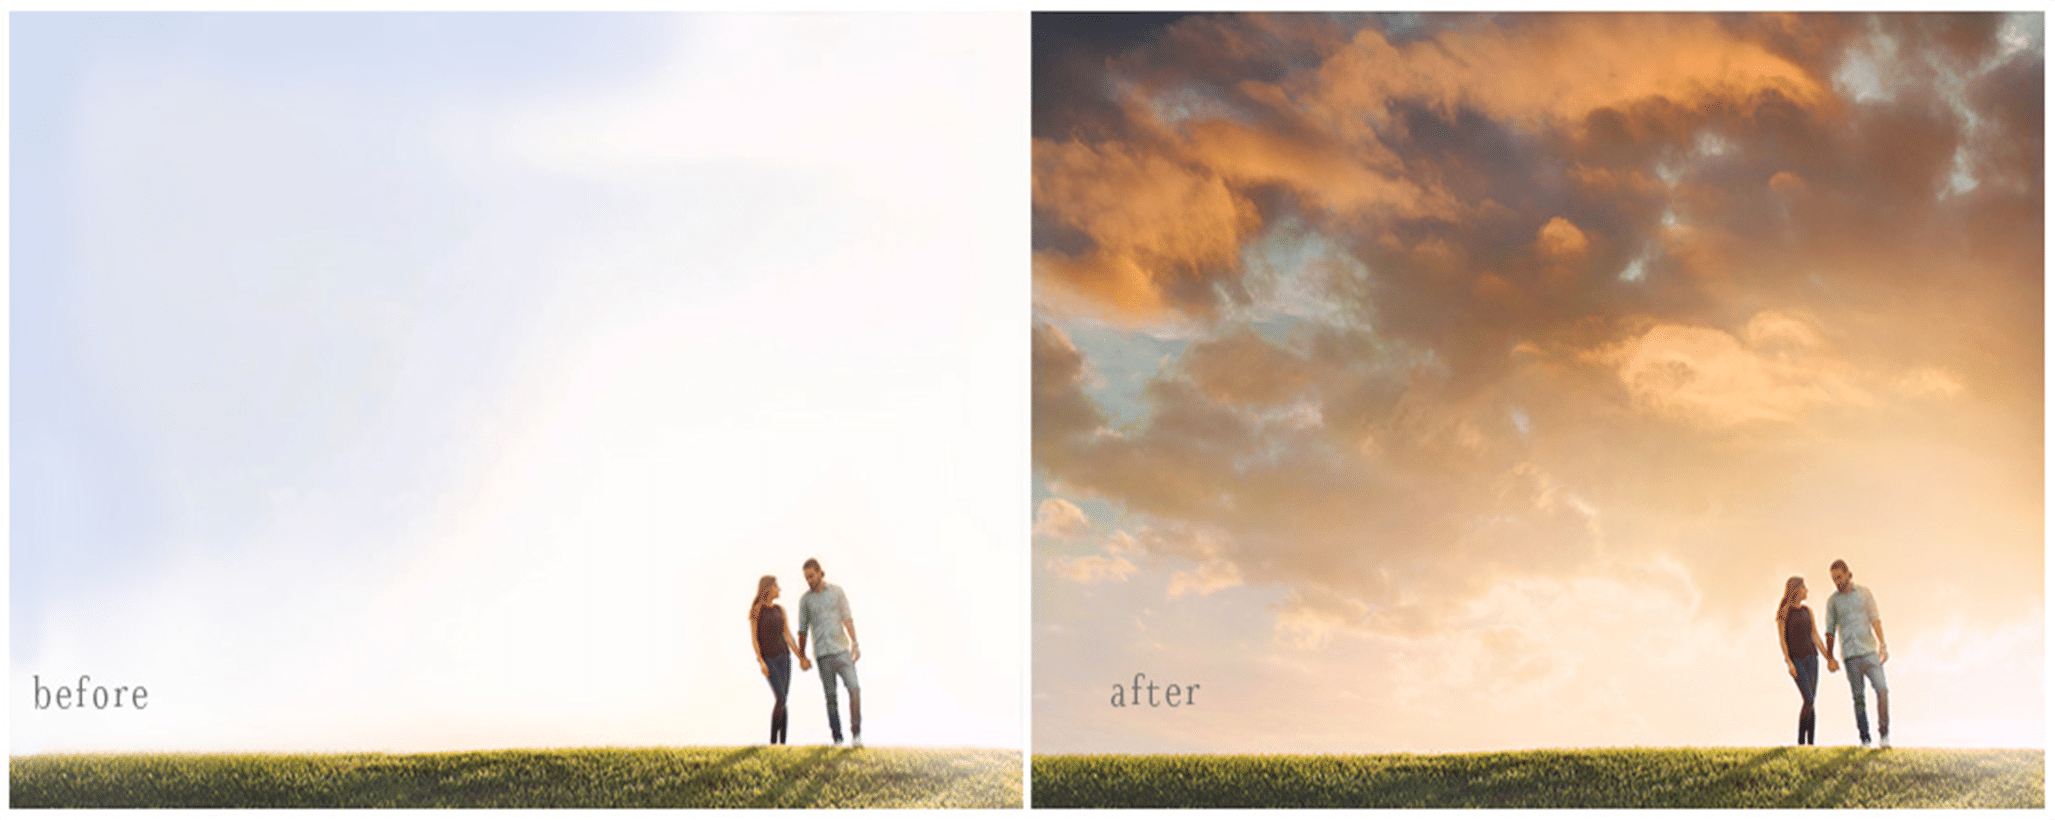
Have you ever added a sky overlay to a photograph? The process can be both exciting and infuriating! Thankfully, my friend Morgan Burks is a Photoshop guru and has a simple step-by-step process for adding a gorgeous sky overlay to your photos {without making it look fake or cheesey}! Make sure you take notes and show us your finished results because I think you’re really going to like what she has to share! Between this and the liquify tool, you’re gonna have some fab tools up your pretty little sleeves!
xoxo, Cyrissa

“As much as I adore taking pictures, the introvert in me has always secretly looked forward to the editing part of photography the most. One of my favorite ways to enhance my photos is to add a sky overlay. Personally, I love that with Sky Overlays I can completely change the mood of an image simply by replacing a plain sky with one that’s more dramatic.
If you’re not familiar, a sky overlay is an image file of a sky that you can insert and blend into your photo using Photoshop. Sky Overlays are usually JPEG files and can come in an endless variety of styles; from blue skies to storm clouds, and from sunsets to starry night skies.
Adding sky overlays to your photos allows you to dramatize boring or plain skies, creating a more visually appealing final image.

the Step by Step process
1. Open the image you wish to edit in Photoshop, then go to File > Place. In newer versions of Photoshop, you’ll choose File > Place Embedded.
2. When the next box pops up, navigate to the folder where your sky overlays are saved. Choose the one you’d like to use, and then click ‘Place’.
3. The sky overlay will then open directly onto your image. Drag the corners to stretch the sky until it fits your photo. You’ll want to be sure the edges of the sky overlay completely fill the sky area in your image.
4. Change your sky overlay layer to ‘Multiply’ blend mode. This step instantly begins to blend the sky overlay with the skyline of your photo! This is a freaking game-changer if you’ve ever had trouble blending through trees or grass!
5. Lastly, use a Layer Mask and a soft black brush to remove the sky effect from any areas that you don’t want it to show up!
Watch me apply a Sky Overlay!
I’ll show you a few special techniques for an even quicker application! If you like it, make sure you subscribe to my YouTube channel!
Want to give these steps a try on your own? Grab this free sunset sky overlay to practice with! If you’d prefer a blue sky, check out this freebie instead. It’s got a rainbow!
Struggling? Here are some sky overlay tips!
If the image you’re editing has a blurry background, adding a Gaussian blur to your chosen Sky Overlay can help increase the believability factor of your edit.
If there’s sunlight visible in the sky overlay or in your image, you can flip the Sky Overlay if needed to ensure the lighting direction matches. To do this, go to Edit > Transform > Flip Horizontal right after you add the sky. Just be sure to do this before you use the layer mask to make adjustments.
Another trick for a believable result, is to choose a Sky Overlay that’s similar in color or tone to the photo you’re working on. This will keep you from needing to make additional adjustments to match the colors.

BUT, if you don’t mind a little extra editing and you just want to have fun and get really creative – add a sky as bold as you want! If you need help, check out this tutorial! I’ll show you how to change the colors and lighting in your image to believably match a really bold sky overlay.
I hope you have so much fun trying these tips and adding skies to your photos! If you have any questions or want to share your edits with me, reach out anytime!”
Happy editing,
Morgan
 Morgan Burks is a sky-obsessed portrait photographer and Photoshop instructor living in Manhattan, KS. She creates editing tools and educational resources for photographers, including her free weekly Tutorial Tuesday videos.
I love Morgan Burks Photography & Product Shop – She offers exceptional customer service and she’s so incredibly talented!!! Swooning over her work and editing products <3 Thanks for sharing this!
SHE IS THE BEST! we were so grateful to have her share so much wisdom with us! 🙂